3D Modelling - Glam Rock theme
Objective: Make a character inspired by 70's rock/'Glam Rock' and its themes
Research
Key Things about Glam Rock:
- Glam rock emerged in the 1970s as a flamboyant subgenre of rock music, characterized by extravagant fashion, theatrical performances, and catchy melodies.
- It originated in the British music scene as a reaction against the serious nature of prevailing rock music, drawing inspiration from sources like cabaret and science fiction.
- Glam rock artists embraced androgyny, pushing the boundaries of conventional fashion with glitter, sequins, and flamboyant costumes.
- The music featured energetic rhythms, anthemic choruses, and audience participation.
- Glam rock had a profound impact on the music and fashion industries, challenging societal norms and inspiring future musicians and designers.
- Glam rock can be seen as a fashion as well as musical subgenre. Glam artists rejected the revolutionary rhetoric of the late 1960s rock scene, instead glorifying decadence, superficiality, and the simple structures of earlier pop music.
Example of a band:
.jpg)
Band - Queen - Queen are a British rock band formed in London in 1970 by Freddy Mercury (lead vocals, piano), Brian May (guitar, vocals), and Roger Taylor (drums, vocals), later joined by John Deacon (bass). Their earliest works were influenced by progressive rock, hard rock, and heavy metal, but the band gradually ventured into more conventional and radio-friendly works by incorporating further styles, such as arena rock and pop rock.
Shape Theory Research and AI Interpretation:


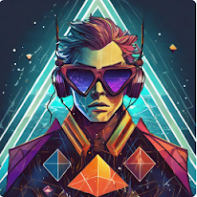
We have investigated shape theory and its use in character designs for giving characters certain traits to help them fulfil their role in the game/story they are in. To demonstrate this while sticking to the Glamrock theme I have used adobe Firefly to generate three Glamrock style characters with each being specified to utilize a different shape in shape theory to give them traits. The first image was specified to use squares which in shape theory has the traits of being reliable, trustworthy, strong, but boring, and stubborn with some of these traits being applicable to the character with the evenly proportioned frame and square shapes suggesting reliability but also being a bit boring. The second image was specified to use circles which in shape theory are seen as safe, friendly, and approachable, which are all traits that can be applied to the character that was generated with the circle accessories and collar and also seeming the least imposing out of the 3 characters. The final image was specified to use triangles which in shape theory may tend to be used for aggression, danger, and villains, it can also be used for showing energy and passion which are two traits that the character looks like they have with headphones and flashy attire resembling that of a DJ which implies that they enjoy being passionate and having lots of energy.
Character Creation
Character Concept Mockup

Using images of existing characters as a baseline for what the design is inspired by and using images of a camera and factory line mechanical arms from the time Glam Rock was mainly relevant I have been able to put together a mock concept for a base for my character. The character will be a little floating robot with limbs that float nearby to itself and they are the drummer of their (nonexistent) group. I will be developing this concept further by implementing more Glam Rock elements into the character when I have their base made in Maya.
Mudbox Practice

We practiced using a software called Mudbox which is used in industry to add additional details to models through sculpting that more rigid modelling software, like Maya, can't add. We practiced this by trying to add more realistic details to a simple elephant resembling model to make it more like an elephant, the original model had more polygons around the eyes and less across the rest of the body which is why there is more detail around the eyes than the rest of the model.
Character Concept

Modelling Blueprint

Base Model for Character's Head


Discovery of Blend shapes

While I was working on the base model while getting caught up in how I wanted to do the face I got distracted with the expressiveness and how to give my character that and myself the ability to animate it, that is when I discovered 'blend shapes'. Blend shapes save a default pose and another pose that you can have the object that has been converted into a blend shape gradually shift into using a slider, such as being able to make eyes on a model go from '|-|' to 'T-T'. I will be using this alongside to make my character highly expressive alongside using the posing of the arms (once I've made them).
Base Model for Character's arms


The images above show the character's right and left arms. They were created as part of one mesh originally to allow use of the symmetry tool to allow both the arms to be the same shape but appropriately mirrored for either side, and once it was made I deleted the faces that connected the arms and filled in the hole to create the base of the arm by using the bridge tool to fill in a face between the edges at the base of the arm, and for adding the sphere hinge like elbows I added in two spheres (one for each elbow) and set them as a child of each arm.
Character Model Head Textured/Done


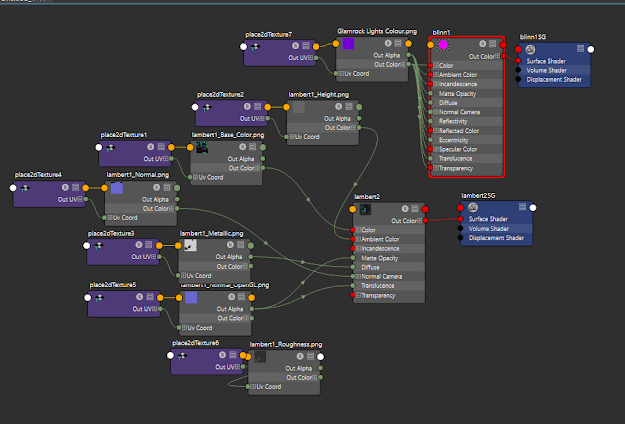
Arms Textured - Model Fully Textured!


Armature rig, Weight Painting, and (near) Done!


...
Comments
Post a Comment